The joint holding two pieces of wood together determines how long a piece of furniture lasts and how it behaves as the seasons change. Wood expands and contracts with humidity — maple in a Canadian winter can move several millimetres across its width — and a joint that ignores this movement will split or loosen over time. Choosing the right joinery method is not a matter of style; it is a structural decision.
Beginners often work through the common joinery types in roughly the order they appear below: from the simplest to execute to the most demanding. Each has a legitimate place in furniture making. The choice depends on the joint's location, the loads it will carry, and how much time is available to cut it.
Butt Joints
A butt joint is the most elementary wood connection: one flat face or edge meets another, and they are held together by glue, screws, nails, or some combination of the three. Cabinet carcases built from plywood — the boxes that form kitchen cabinets or shop storage — often use glued and screwed butt joints because the glue surface area is large, the plywood is dimensionally stable, and the result is more than strong enough for the application.
In solid wood furniture, a plain butt joint has limited use because the long-grain-to-end-grain glue bond is weak. End grain absorbs glue quickly and provides little mechanical resistance. Where a butt joint is the only option — attaching a tabletop cleat, for instance — mechanical fasteners do the structural work and the glue serves as a secondary reinforcement.
Dowel Joints
Adding wooden dowels to a butt joint dramatically increases both glue surface area and resistance to lateral shear. Two boards edge-joined with glue and 8 mm dowels every 250 mm produce a panel that is difficult to pull apart. This is one of the most practical joints for beginners building tabletops from narrower boards: the dowels register the boards during assembly, keeping faces flush while the glue sets, and add genuine strength to the long-grain-to-long-grain glue bond.
Long-grain glue joints — where the grain of both boards runs parallel to the glue line — are remarkably strong. A well-prepared edge joint with good glue often holds better than the wood itself. Dowels in this context are mainly there to keep boards aligned.
Using a Dowelling Jig
Accurate dowelling requires precise hole placement on both mating pieces. A self-centering dowelling jig clamps to the edge of the board and guides the drill bit to a centred position. Porter-Cable and General Tools both make models available through Canadian Tire and online. Alternatively, dowel centres — small metal pins that transfer hole location from one board to the other — are inexpensive and accurate enough for most applications.
Biscuit Joints
Biscuit joints use oval-shaped compressed wood wafers (biscuits) inserted into matching slots cut by a biscuit joiner, sometimes called a plate joiner. When the biscuit contacts moisture from the glue, it swells and tightens the joint. Like dowels, biscuits primarily help with alignment rather than strength; the glue surfaces on either side of the slot do the structural work.
Biscuits work well for face-frame construction, aligning panels edge to edge, and connecting mitered corners where a spline or dowel would be difficult to position accurately. They are less useful in areas of high stress, such as chair legs and rails, where the joint must resist racking forces repeatedly.
Dado and Rabbet Joints
A dado is a channel cut across the grain of a board; a rabbet is a stepped cut along the edge or end. Both are used extensively in case work — bookshelves, cabinets, and chests. Fitting a shelf panel into a dado cut into the side of a bookcase is faster and stronger than any alternative, and it is exactly the joint found in most well-made commercial furniture before flat-pack designs became dominant.
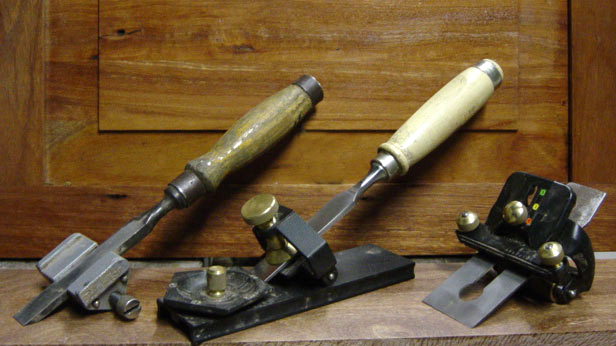
Cutting Dadoes by Hand
A router plane — a hand tool with an adjustable cutter that rides along a flat reference surface — cuts dados and rabbets to a consistent, controllable depth. Stanley made a popular version (the No. 71) for most of the twentieth century, and Veritas manufactures a modern equivalent. The process involves sawing the edges of the channel with a back saw, chiselling out the bulk of the waste, and then using the router plane to flatten the floor of the channel to a precise depth. It is slower than a router, but it produces results that are easier to control for a beginner.
Mortise and Tenon Joints
The mortise and tenon is among the oldest wood joints in recorded history, found in Egyptian furniture and in the frame-and-panel construction of traditional Canadian farmhouses. A tenon — a rectangular projection cut on the end of one piece — fits into a mortise — a matching rectangular cavity cut into the other. Properly sized and glued, this joint resists both tension and racking, making it the standard for table aprons and legs, chair construction, and door frames.
Proportions That Work
A general rule in furniture-scale mortise and tenon work is that the tenon's thickness should be roughly one-third the thickness of the stock it is cut from. A 19 mm (3/4-inch) apron rail, for example, would carry a tenon approximately 6 mm thick. The tenon length should extend at least two-thirds of the way through the mortised piece. These proportions are not absolute — different texts and traditions vary — but they provide a reliable starting point.
Cutting the Mortise
Beginners often chop mortises with a dedicated mortise chisel, which is thicker-bladed and stiffer than a bench chisel, and a mallet. The process involves marking out the mortise with a marking gauge, drilling out most of the waste with a drill press or a brace and bit, and then cleaning to the layout lines with the chisel. A drill press provides more control over hole depth than a hand drill, and many Canadian woodworkers find it worth having even in a primarily hand-tool shop.
Cutting the Tenon
A tenon is sawn to shape with a back saw — typically a tenon saw or a dozuki — and then trimmed to final fit with a shoulder plane or a wide bench chisel. The shoulder of the tenon (the step where the tenon meets the cheek of the rail) must be flat and square for the joint to close properly. Testing the fit dry before applying glue is essential; a tenon that fits correctly offers moderate resistance when pushed by hand but does not require a mallet.
Dovetail Joints
Dovetail joints — named for the trapezoidal shape of the pins and tails — are used where high resistance to the joint being pulled apart is needed. Drawer construction is the classic application: the front being pulled off a drawer is the load the joint is designed for. Hand-cut dovetails are a benchmark skill in hand-tool woodworking, and while they require patience to learn, the tools involved — a back saw, a set of chisels, and a marking gauge — are the same ones used for other joinery.
The typical dovetail ratio for hardwoods is 1:8 (meaning the angle is 1 unit of rise for every 8 units of run). Softwoods, being weaker in shear, use a shallower angle of 1:6. A sliding bevel set to this ratio, used to mark out the tails before sawing, is all the setup the layout requires.
Choosing the Right Joint
In practice, most furniture projects use a combination of these methods. A dining table might use mortise and tenon joints for the leg-to-apron connections, dadoes to house a lower shelf, and a glued edge joint for a tabletop made from two or three boards. Understanding each joint's strengths — and the loads it will see in use — is what allows a builder to make informed choices rather than defaulting to whatever is easiest to cut.
For anyone building their first pieces, the order of learning might run: edge joints for panel glue-ups, dadoes for case work, and mortise and tenon for frame construction. Dovetails, with their steeper learning curve, are often left until the earlier joints feel reliable and the sawing and paring skills behind them are solid.